티스토리 뷰
[ 1. Controller 연습 ] (*****)
[ 1 - 1. @RequestMapping ]

[ 1 - 2. @RequestMapping(path = " ") ]

[ 1 - 3. @RequestMapping(path = { " " }, method = { " " } ) ]

[ 1 - 4. 단축형 - @GetMapping(path) / @PostMapping(path) ]

[ 1 - 5. 매개변수 있는 버전 ] (****)


[ 1 - 6. 매개변수가 Model인 버전 ] (****)

[ + 화면에서 Model 활용 ]

[ 1 - 7. @ModelAttribute(key) / Command Object ] (****)


[ + 화면에서 Model 사용 ]

[ 1 - 8. redirect: / RedirectAttributes 다른 곳으로 전송파라미터를 전달 ] (****)


[ 1 - 9. DispatcherServlet에 다음과 같은 객체 요구하기 ] ( 추천x )

[ 1 - 10. return 값으로 View를 지정해 주지 않을 경우 ]

더보기
[ + 코드 보기 ]
package org.zerock.myapp.controller;

import java.util.Date;
import java.util.List;

import javax.servlet.http.HttpServletRequest;
import javax.servlet.http.HttpServletResponse;
import javax.servlet.http.HttpSession;

import org.springframework.format.annotation.DateTimeFormat;
import org.springframework.http.HttpStatus;
import org.springframework.stereotype.Controller;
import org.springframework.ui.Model;
import org.springframework.web.bind.annotation.GetMapping;
import org.springframework.web.bind.annotation.ModelAttribute;
import org.springframework.web.bind.annotation.PostMapping;
import org.springframework.web.bind.annotation.RequestMapping;
import org.springframework.web.bind.annotation.RequestMethod;
import org.springframework.web.bind.annotation.RequestParam;
import org.springframework.web.bind.annotation.ResponseStatus;
import org.springframework.web.servlet.mvc.support.RedirectAttributes;
import org.zerock.myapp.domain.SampleDTO;

import lombok.NoArgsConstructor;
import lombok.extern.log4j.Log4j2;


@Log4j2
@NoArgsConstructor

@RequestMapping("/sample2/") // 기본 URI ( base URI )
@Controller
public class SampleController2 {

	// =======================================================
		// 1. @RequestMapping or RequestMapping("")
	// =======================================================

	@RequestMapping
	// + 이 경우에는 상세 URI가 지정되어 있지 않기에 기본 URI만 남게 된다.
	// + 이 경우에는 http://localhost:8080/sample2/로 요청을 보내야 한다.
	// + 실행하면 basic() invoked.가 찍히게 된다.
	public String basic() {
		log.trace("basic() invoked.");
		return "sample";
	} // basic

	// =======================================================
		// 2. @RequestMapping(path="", method=GET/POST)
	// =======================================================

	@RequestMapping(path="/basicGet", method=RequestMethod.GET)
	// + 전체 URI = 기본 URI + 상세 URI -> /sample2//basicGet...? (x)
	// + spring이 /sample2/basicGet로 처리해 준다.
	public String basicGet() {
		log.trace("basicGet() invoked.");
		return "sample";
	} // basicGet

	// =======================================================
		// 3. @RequestMapping(path="", method=GET/POST)
	// =======================================================

	@RequestMapping(
			path={"/basicGet2", "/basicGet3", "/basicGet4"},
			method= {RequestMethod.GET})
	// + 위와 같이 배열 안에 { } 여러 개를 지정할 수 있다.
	// + method에서도 { }를 통해서 GET방식과 POST 방식 모두 지정해 줄 수 있다.
	public String basicGet2() {
		log.trace("basicGet2() invoked.");
		return "sample";
	} // basicGet2

	// =======================================================

	@RequestMapping(
			path= {"/basicGet70", "/basicGet80"},
	        method= {RequestMethod.GET, RequestMethod.POST} // get 방식 , post 방식 둘다 요청 가능
	   ) // http://localhost:8080/sample/basicGet
	   public String basicGet88(){
	      log.trace("basicGet88() invoked.");
	      return "sample";
	   } // basicGet88

	// =======================================================
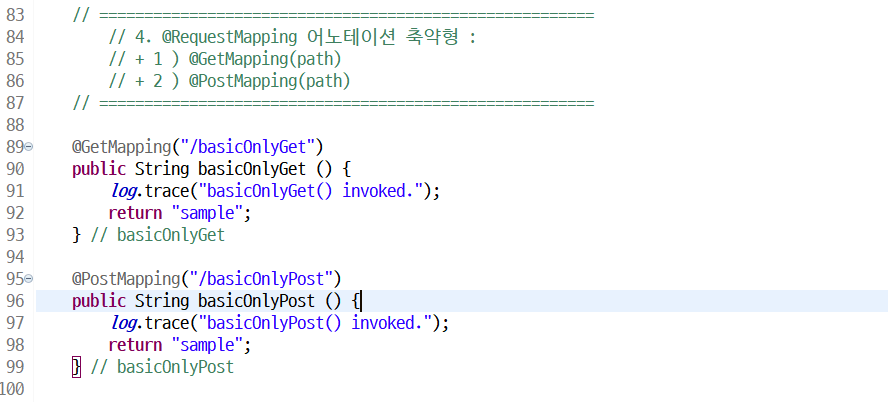
		// 4. @RequestMapping 어노테이션 축약형 :
		// + 1 ) @GetMapping(path)
		// + 2 ) @PostMapping(path)
	// =======================================================

	@GetMapping("/basicOnlyGet")
	public String basicOnlyGet () {
		log.trace("basicOnlyGet() invoked.");
		return "sample";
	} // basicOnlyGet

	@PostMapping("/basicOnlyPost")
	public String basicOnlyPost () {
		log.trace("basicOnlyPost() invoked.");
		return "sample";
	} // basicOnlyPost

	// =======================================================
		// 5. @GetMapping(path) with DTO parameter ( 매개변수 o ) (***)
	// =======================================================

   @GetMapping("/ex01")
   public String ex01(SampleDTO dto) {
	   log.info("ex01(SampleDTO dto) invoked.");

	   log.info("\t + dto : {}", dto);

	   return "sample";
   } // ex01

// =======================================================

   @GetMapping("/ex02")
   public String ex02(String name, Integer age) {
	   log.info("ex02(SampleDTO dto) invoked.");

	   log.info("\t + name : {}, age : {}", name, age );

	   return "sample";
   } // ex02

   // =======================================================
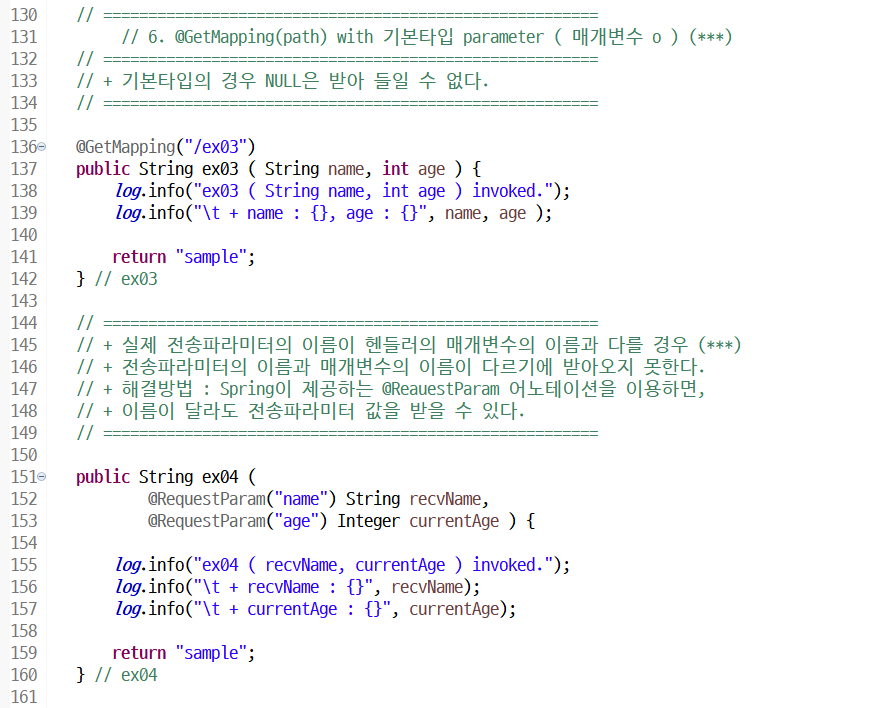
   		// 6. @GetMapping(path) with 기본타입 parameter ( 매개변수 o ) (***)
   // =======================================================
   // + 기본타입의 경우 NULL은 받아 들일 수 없다.
   // =======================================================

   @GetMapping("/ex03")
   public String ex03 ( String name, int age ) {
	   log.info("ex03 ( String name, int age ) invoked.");
	   log.info("\t + name : {}, age : {}", name, age );

	   return "sample";
   } // ex03

   // =======================================================
   // + 실제 전송파라미터의 이름이 헨들러의 매개변수의 이름과 다를 경우 (***)
   // + 전송파라미터의 이름과 매개변수의 이름이 다르기에 받아오지 못한다.
   // + 해결방법 : Spring이 제공하는 @ReauestParam 어노테이션을 이용하면,
   // + 이름이 달라도 전송파라미터 값을 받을 수 있다.
   // =======================================================

   public String ex04 (
		   @RequestParam("name") String recvName,
		   @RequestParam("age") Integer currentAge ) {

	   log.info("ex04 ( recvName, currentAge ) invoked.");
	   log.info("\t + recvName : {}", recvName);
	   log.info("\t + currentAge : {}", currentAge);

	   return "sample";
   } // ex04

	// =======================================================
		// 7. @GetMapping(path) with List객체 parameter ( 매개변수 o ) (****)
	// =======================================================

   													// + @ResponseStatus는 에러가 나지 않아도 BadRequest로 보낼 수 있다.
   													// + @ResponseStatus는 에러가 나도 우리가 지정한대로 나가게 된다.
   													// + 그렇기에 사실 사용하지 않는 편이 좋을 수도 있다.
   @ResponseStatus(HttpStatus.OK)					// Http Status code : 200, 404, 500
   @GetMapping("/ex05List")
   public String ex05List(
		   @RequestParam("id") List <String> id) // ArrayList로 만들어서 제공된다. (****)
   		   // Integer [] id					     // 배열로도 얻을 수 있다. Arrays.toString
   		   // + 배열 외의 다른 자료구조 타입으로, 여러 값을 가지는 전송파라미터를 필요로 하는 경우에는
   		   // + 반드시 @RequestParam 어노테이션을 붙여야 한다. (******)
   {

	   log.info("ex05List(id) invoked.");

	   log.info("\t + ids : {}", id);
	   log.info("\t + type : {}", id.getClass().getName());

	   return "sample";
   } // ex05List

	// =======================================================
   		// 8. @GetMapping(path) with 날짜형식의 parameter ( 매개변수 o ) (***)
	// =======================================================

   @GetMapping("/ex06")
   public String ex06(
		   // @DateTimeFormat(iso=ISO.DATE) Date date // OK
		   @DateTimeFormat(pattern = "yyyy-MM-dd HH:mm:ss") Date date ) {

	   log.info("\t + date {}", date);
	   log.info("\t + type : {}", date.getClass().getName());

	   return "sample";
   } // ex06

	// =======================================================
   	// + 전송파라미터의 경우에는 값이 String으로 받아지게 되는데
   	// + Spring에서 자동으로 변환해주게 된다. ( 형변환이 가능한 경우에만 )
	// =======================================================

	// =======================================================
   		// 9. @GetMapping(path) with Model타입의 parameter ( 매개변수 o ) (***)
	// =======================================================
    // + Model 타입의 객체는 MVC 패턴에서 말하는 Model 객체로
   	// + 비지니스 로직의 수행결과 데이터를 저장하는 '상자'와도 같은 역할을 수행한다.
   	// + 실제 타입을 출력하면, 바로 "Map" 객체임을 알 수 있다.
    // =======================================================

   @GetMapping("/ex07")
   public String ex07 ( String name, Integer age, Integer page ,Model model ) {

	   log.info("ex07(name, age, page, model) invoked.");

	   log.info("\t + name : {}, age : {} , page : {} ", name, age, page);
	   log.info("\t + model : {} ", model.getClass().getName());
	   // org.springframework.validation.support.BindingAwareModelMap

	   SampleDTO dto = new SampleDTO();
	   dto.setName(name);
	   dto.setAge(age);

	   // Model이란 상자 안에 비지니스 데이터(즉, 다양한 타입의 객체)를
	   // 저장할 때에는, 'addAttribute(key, value)'로 넣는다. (****)
	   // =======================================================
	   // + Model 상자에 addAttribute(key, value) 메소드를 이용해 객체를 저장한다는 의미는
	   // + 바로 Request Scope 공유영역에 저장된 key 이름으로 Value 객체를 바인딩 ( 즉, 공유속성 생성 )하는 것이다.
	   // + 때문에, EL 변수로 지정이 가능한 공유속성이 생기게 된다.
	   // =======================================================
	   model.addAttribute("sampleDto",dto);
	   model.addAttribute("page", page);

	   // Model을 활용하는 화면 불러오기
	   return "commandObject";
   } // ex07

	// =======================================================
	   // 10. @ModelAttribute(key) / Command Object (****)
	// =======================================================

   @PostMapping("/ex08")
   // =======================================================
   // + 전송파라미터를 객체를 통해서 수집하면, 이 객체를 스프링에서는 "Command Object"라고 부른다.
   // + 스프링의 Command Object는 자동으로 View에게까지 전달된다. (****)
   // =======================================================
   // + Command Object로 들어오면 RequestScope에 자동으로 등록되게 되는데,
   // + 이때 key의 이름은 Command Object 객체의 이름의 첫문자를 소문자로 변환해서 저장한다.
   // =======================================================
   // + 또한 @ModelAttribute 어노테이션을 사용하면,
   // + 이것도 Model 상자에 들어와서 RequestScope에 들어가게 되어
   // + view까지 전달할 수 있다.
   // =======================================================
   // + @ModelAttribute를 메소드 위에 붙이게 될 경우,
   // + 매개변수를 담는 것이 아니라, 메소드의 리턴값을 RequestScope에 바인딩한다.
   // + 즉, 이 경우에는 commandObject라는 뷰의 이름이 RequestScope에 바인딩된다.
   // =======================================================
   public String ex08 ( SampleDTO dto, @ModelAttribute("page") Integer page ) {

	   log.info("ex08(dto, page) invoked.");

	   log.info("\t + dto : {}", dto);
	   log.info("\t + page : {}", page);

	   return "commandObject";
   } //ex08

   // =======================================================
   // + @ModelAttribute를 통해 화면에 전송하기
   // =======================================================
   @GetMapping("/ex09")
   public String ex09 (
		   @ModelAttribute("name") String name,
		   @ModelAttribute("age") Integer age,
		   @ModelAttribute("page") Integer page ) {

	   log.info("ex09(name, age, page) invoked.");

	   log.info("\t + name : {}, age : {} , page : {} ", name, age, page);

	   // Model을 활용하는 화면 불러오기
	   return "commandObject2";
   } // ex09

   // =======================================================
   		// 11. Predefined RedirectAttribute
   // =======================================================

   // =======================================================
   // + To redirect a request into the other url
   // =======================================================

   @GetMapping("/ex10")
   // + 리다이렉트 되는 target url로 이동시, 같이 전달될 전송 파라미터가 필요할 경우
   // + 이 RedirectAttributes 객체를 사용한다. ( Like Model 상자 )
   public String ex10(String name, Integer age, RedirectAttributes rttrs) {

	   log.info("ex10(name, age, rttrs) invoked.");

	   log.info("\t + 1. rttrs : {}", rttrs);
	   log.info("\t + 1-2. rttrs type : {}", rttrs.getClass().getName());
	   // rttrs type : org.springframework.web.servlet.mvc.support.RedirectAttributesModelMap

	   log.info("\t + 2. name : {}, age : {}", name, age);

	   // =======================================================
	   // 1 ) added flash attribute into header ( flash == 1회성 )
	   // =======================================================
	   // + 1번만 전달하고 없어져 버린다. ( 추천 x )
	   // + 이렇게 되면 전송된 값을 확실하게 확인할 수 없다.
	   // =======================================================
	   // "Referer: http://vfx-lenovo:8090/sample2/ex10?name=&age="
	   // =======================================================
	   // rttrs.addFlashAttribute("name", name);
	   // rttrs.addFlashAttribute("age", age);

	   // =======================================================
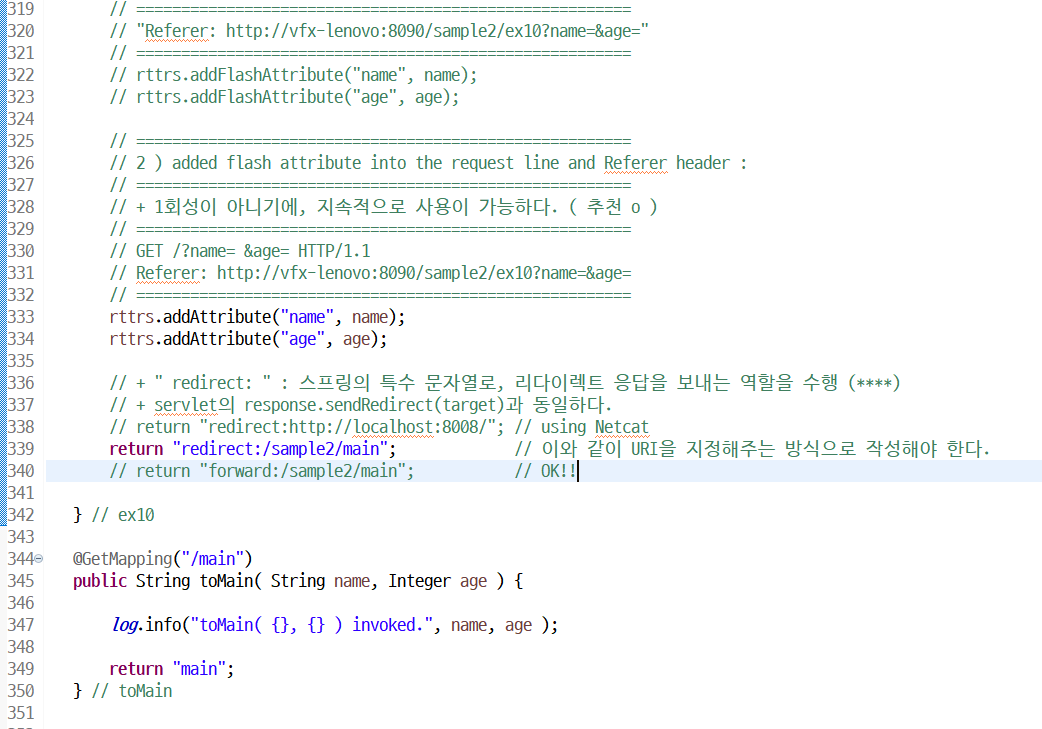
	   // 2 ) added flash attribute into the request line and Referer header :
	   // =======================================================
	   // + 1회성이 아니기에, 지속적으로 사용이 가능하다. ( 추천 o )
	   // =======================================================
	   // GET /?name= &age= HTTP/1.1
	   // Referer: http://vfx-lenovo:8090/sample2/ex10?name=&age=
	   // =======================================================
	   rttrs.addAttribute("name", name);
	   rttrs.addAttribute("age", age);

	   // + " redirect: " : 스프링의 특수 문자열로, 리다이렉트 응답을 보내는 역할을 수행 (****)
	   // + servlet의 response.sendRedirect(target)과 동일하다.
	   // return "redirect:http://localhost:8008/"; // using Netcat
	   return "redirect:/sample2/main";				// 이와 같이 URI을 지정해주는 방식으로 작성해야 한다.
	   // return "forward:/sample2/main";			// OK!!

   } // ex10

   @GetMapping("/main")
   public String toMain( String name, Integer age ) {

	   log.info("toMain( {}, {} ) invoked.", name, age );

	   return "main";
   } // toMain

   // =======================================================
   		// 12. DispatcherServlet에 아래와 같은 객체도 요구할 수 있다.
   		// (1) request (2) response (3) session
   // =======================================================
   // + 하지만 이는 Spring의 MVC패턴을 어긋나게 하기에 추천하지 않는다.
   // + 만약 이러한 방법으로 개발해야 된다면, 그냥 Servlet을 사용하는 것이 좋다.
   // =======================================================

   @GetMapping("/core")
   public String core(HttpServletRequest request, HttpServletResponse response, HttpSession session) {

	   log.info("core() invoked.");

	   log.info("\t + 1. request : {}", request);
	   log.info("\t + 2. response : {}", response);
	   log.info("\t + 3. session : {}", session);

	   return "sample";
   } // core

   // =======================================================
   		// 13. return 값을 주지 않는다면
   // =======================================================
   // + 만약 return 값으로 View를 지정해주지 않는다면,
   // + 최종 View의 이름이 자동으로 기본 URI(/sample2) + 상세 URI(/returnVoid)로 지정된다.
   // =======================================================

   @GetMapping("/returnVoid")
   public void returnVoid() {

	   log.info("returnVoid() invoked.");

	   // return View; 생략
	   // + View의 이름을 반환하지 않으면, 최종 View의 이름은 다음과 같이 결정된다. :
	   // + 최종 view 이름 = 기본 URI + 상세 URI => 예 : "/sample2/" + "/returnVoid" + ".jsp"

   } // returnVoid


} // end class
728x90
'KH 정보교육원 [ Java ]' 카테고리의 다른 글
| KH 113일차 - Spring MVC ( 파일 업로드 처리 ) (****) (0) | 2022.08.08 |
|---|---|
| KH 112일차 - Spring ( Controller ) (****) (0) | 2022.08.05 |
| KH 110일차 - Spring ( Spring MVC ) (****) (0) | 2022.08.03 |
| KH 109일차 - Spring ( mybatis-spring : mapper ) (******) (0) | 2022.08.02 |
| KH 108일차 - Spring ( MyBatis와 연동 ) (****) (0) | 2022.08.01 |
댓글
